This series started off with wanting to explore dbt a little, and I figured if I was going to do that I should attempt to make something demo-worthy and so the plan is to have a full blown observable dbt on K8s deployment using Airflow for orchestration.
This article is my own personal journey through getting this set up and working. I have tried my best to make this tutorial-like, however if you try to just execute the code blocks sequentially you will not end up with a complete system. If you are attempting to follow along to create the system with me as you go you will need to clone my repo. Now the part I have been struggling with is how to go through the DBT tutorial as the code in the repo will only be in it’s final state and wont show the checkpoints along the way - so I suggest for the dbt part that you create a folder named jaffle-shop at the root of my cloned repo and follow along there, referring to the dbt documentation where necessary.
Tools
There is a bunch of commands that I will probably use throughout this document, I’ve tried to capture them all here in case you do attempt to follow along.
P.S. I’m on MacOS.
Arkade (K8s-related pacakage manager)
- kubectl
- kubens
- kubectx
- helm
- yq
Brew (OS package manager)
- libpq (for psql)
- direnv
Pipx (Isolated python package manager)
- sqlfluff (pipx install sqlfluff && pipx inject sqlfluff sqlfluff-templater-dbt)
Installing Minikube
The official documentation is easy enough to follow, except I started Minikube with the following command:
minikube start --memory 8192 --cpus 2
The reason for this is that by default you only get 2048 MiB of RAM and 2 cpus, and that is not enough for my demo which deploys quite a lot of stuff!.
Enabling ingress
At some point we will need to expose the Airflow UI and some other tools so we will use Minikube’s handy command to enable an ingress controller.
minikube addons enable ingress
Just as an aside, the ingress controller can be accessed via the Minikube IP which you can get via the following command:
minikube ip
If you were to execute something like curl $(minikube ip) you should get a 404, this proves that ingress (nginx) is working - although it has no rules and so it just returns a 404.
Configuring kubectl
We will be working in the dok (dbt on Kubernetes) namespace from here on out, so I like to set up kubectl to interact with that namespace without having to specify the namespace every time I execute a command. There is a bunch of ways to do this, but we have the technology and so let’s do this with kubens.
kubectl create namesapce dok
kubens dok
Installing Airflow
Let’s go for an easy win and set up Airflow first, even though it wont be used until the very end.
I intend to eventually be able to deploy this as a single application so I will be building up a wrapper Helm Chart to deploy everything. This does wrap the official Airflow Helm Chart.
Now we need to actually install Airflow into our local Minikube cluster. For that we will use the following Helm command.
helm upgrade --install dbt-on-k8s . \
    --create-namespace \
    --namespace dok \
    -f values.yaml \
    --set "airflow.enabled=true"
helm upgrade --installis used here because you can use it whether you are updating an existing chart or installing one for the very first time. It’s just better.
Now that we have deployed Airflow (and before we take a look at it) let’s discuss what we have configured in the values.yaml. Just for the sake of completeness the values.yaml is the place where Helm Chart’s expect things to be specified that will be templated into the Kubernetes Manifests.
executor:
This has been set to KubernetesExecutor, this means that Airflow will use Kubernetes Pod’s to execute jobs, as opposed to other methods including just executing the command locally in a separate shell.
ingress: This is so that I can navigate to the Airflow Webserver UI, it created a Kubernetes resource that allows ingress into the cluster from the outside via a hostname.
If you are following along you will need to update the
ingress.web.hosts.name[0]section as it references MY Minikube private IP address and chances are yours is not the same. If you are interested in how this is working without a real domain you can read more about nip.io here.
You can quickly update the ip with this handy command:
yq -i e ".airflow.ingress.web.hosts.0.name |= \"airflow-$(minikube ip).nip.io\"" values.yaml
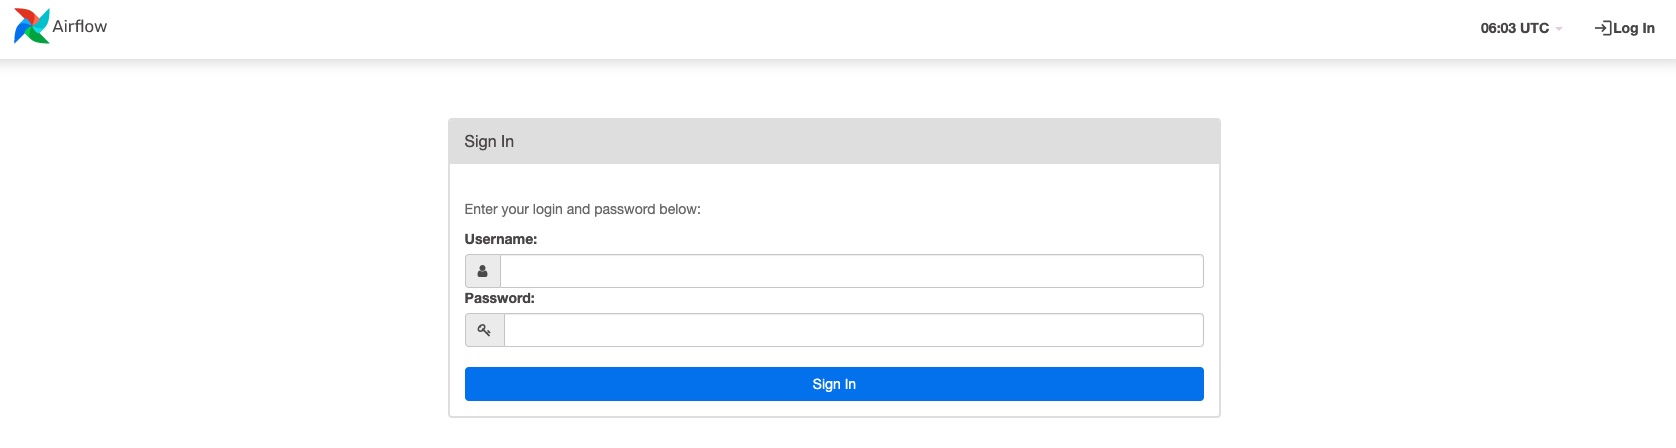
Logging in and checking out the UI
The most exciting part, now you can log in by navigating to your ingress (mine is at https://airflow-192.168.64.5.nip.io/home). You will need to ignore the fact that the certificate is untrusted and then you should see the following page and you can log in with the default user/pass (admin/admin).
Setting up a data warehouse (Postgres)
This will be our data warehouse (DWH), and yes, I have gone a little overboard - a single Postgres database would have been fine. I however, have opted to deploy a cluster.
I am using this Postgres Operator and basic guide to deploy and manage my Postgres cluster. I am just using an example deployment and much more rigorous configuration should take place before using this in production!
We can now update our deployment to enable the Postgres Operator with the following command. We are installing the operator and deploying a cluster all in one step!
helm upgrade --install dbt-on-k8s . \
    --create-namespace \
    --namespace dok \
    -f values.yaml \
    --set "airflow.enabled=true" \
    --set "postgres-operator.enabled=true" \
    --set "postgres_dwh.enabled=true"
After a few minutes you should have a postgres cluster set up, including a database named dwh with two schemas, dev and prod. We are just setting this up in advance so that we can simulate deploying to dev and prod when we use dbt. I don’t know how ergonomic or necessary this is - but we are doing it anyway!
Any time we interact with the DWH we will probably use the dev schema.
You will know that your cluster is up and ready to go when the STATUS is running.
kubectl get postgresqls
Opening a connection to our Postgres cluster
Alright still more set up to do before getting on with the dbt tutorial. We need to be able to interact with our beautiful Postgres cluster. We have a few options here. We can just set up a port-forward using kubectl or we can expose the database via an Ingress (capital I as this is the Kubernetes Ingress object). I am going to opt for port-forwarding because I am impatient to run dbt. You can set this up as follows:
If you are familiar with Kubernetes, you might venture off on your own (ignoring the documentation) when attempting to port-forward to the Postgres cluster (like I did). This will set you up for failure if you attempt to port-forward the service as the labels are not configured to point to the master. There is a reason for this that I don’t understand at this point. You can reach the cluster through the service when you are inside the cluster, however when you are outside the cluster you need to port-forward to the actual master node
¯\_(ツ)_/¯.
# get name of master pod of acid-minimal-cluster
export PGMASTER=$(kubectl get pods -o jsonpath={.items..metadata.name} -l application=spilo,cluster-name=acid-minimal-cluster,spilo-role=master)

# set up port forward (note we are using port 6432 locally)
kubectl port-forward $PGMASTER 6432:5432
Now that we have the port-forwarding setup we can go ahead and use psql to connect to the cluster.
export PGPASSWORD=$(kubectl get secret dwh-dev-owner-user.acid-minimal-cluster.credentials.postgresql.acid.zalan.do -o 'jsonpath={.data.password}' | base64 -d)
export PGSSLMODE=require

# Note the subtle name difference where '-' is replaced with '_'
psql -d dwh -U dwh_dev_owner_user -h localhost -p 6432
You can try out a few things, although there isn’t anything much there! You should see our demo schema though!
# List our tables (there are none)
\dt+

# List our schemas
\dn+
dbt
Finally we made it! We are going to follow along with the dbt tutorial, I will document everything I am doing here, but if something has changed between my writing and you reading (which it inevitably will) you should get along fine by looking at the original dbt tutorial.
We are not using the cloud part of dbt, we will be using dbt-core and the cli.
Install dbt
You need to install the dbt tool. You can find how to here. I have installed it into it’s own python virtualenv, this makes the most sense especially when you are working in a team and you want to make sure everyone is using the same version. Needless to say you should be deploying via CI and it should also have the same version.
I have opted to put the virtualenv at the root of my repo, this helps my IDE of choice (vscode) auto-detect the correct python environment, my dbt package will be nested which would usually not be the case, it’s only because I also have the Helm Chart next to it.
# Create the virtualenv
python -m venv .venv

# This will install the Postgres adapter and dbt-core
pip install dbt-postgres
Creating a dbt project
Following the tutorial this will set us up a cookie-cutter project that we can start working in. Bear in mind that we are also changing into the project directory and all commands from here on out will assume this!
dbt init jaffle_shop
cd jaffle_shop
Setting up some other ‘stuff’
I have opted to set up a bunch of other stuff in the jaffle_shop directory that I would have in a real repository.
The first thing I have set up is the .envrc which is loaded by direnv whenever I change into the directory. This conveniently sets some environment variables containing things like, Postgres settings, database user/pass (extracted from Kubernetes), the Minikube IP etc. I will assume the environment is set up correctly in other parts of the project.
Another thing I have set up is sqlfluff. I don’t have a lot of experience with this, but it is a linter and auto-formatter for SQL that supports dbt’s jinja templating syntax, because I hate having to make decisions about formatting, and having to worry about being consistent with the rest of my team.
But I digress.
Connecting dbt to our DWH
The settings for dbt are, by default, in the home directory in ~/.dbt/profiles.yml. I however, have set the environment variable DBT_PROFILES_DIR to point to the jaffle_shop directory and I will be using a local profiles.yml. As I mentioned above I have set the .envrc to load the user/pass information for our DWH into the environment, it is from the environment that I then get the user/pass information into the profiles.yml like so:
jaffle_shop:
  outputs:

    dev:
      type: postgres
      threads: 30
      host: localhost
      port: 6432
      user: "{{ env_var('DBT_DWH_DEV_USER') }}"
      pass: "{{ env_var('DBT_DWH_DEV_PASSWORD') }}"
      dbname: dwh
      schema: dev
      ...
If you decide not to go for an environment variable based approach then you can extract the password from the kubernetes secret like this:
kubectl get secret dwh-owner-user.acid-minimal-cluster.credentials.postgresql.acid.zalan.do -o 'jsonpath={.data.password}' | base64 -d
Note the first bit of the secret name is the user albeit with the - replaced with _.
Now that you have this configuration you can use dbt’s handy command to check that we have everything correct.
# Check the dev target (this is the default so the `-t dev` is superfluous)
dbt debug -t dev
# Check the prod target
dbt debug -t prod
You will need to address any issues that arise. Make sure your port-forward is still running!
Running dbt
Wooo! now we are getting on with actually running dbt. I will probably diverge from the tutorial and instead use it more as a spiritual guide.The reason I am doing this is an attempt to implement dbt’s best practice recommendations from the get-go.
For a bit more information about how I decided to structure my project directory.
To start with we need to do two things, the first is to run dbt seed which will load some raw csv’s into our database (we will need this later).
dbt seed -t dev
Again, the target selection -t dev is unnecessary as it is the default. We have now seeded some data from the csv’s in our seeds/ folder. We will use this to do some modelling with, but first lets check out what happened in the database using the following command (relies on the .envrc file setting some values).
psql postgresql://$DBT_DWH_DEV_USER:$DBT_DWH_DEV_PASSWORD@localhost:6432/dwh
Now that we are in, lets check out our tables!
dwh=> \dt
                List of relations
 Schema |   Name    | Type  |       Owner
--------+-----------+-------+--------------------
 dev    | customers | table | dwh_dev_owner_user
 dev    | orders    | table | dwh_dev_owner_user
 dev    | payments  | table | dwh_dev_owner_user
(3 rows)
As you can see we have three tables, one for each file that was in our seeds/ directory. Now how did dbt know which schema to put these in and what to name our tables. It puts the tables in the schema specified for the target in profiles.yml in this case dev. It creates the name based off of the file name. So it’s nothing too magical!
Lets seed prod now as well.
You could also seed this data into a schema that both the dev and the prod user have access to, but I was having trouble configuring permissions to allow this with the Kubernetes Postgres Operator, and I didn’t want to have to manually intervene with the DWH to mess with permissions after creation.
dbt seed -t prod
Doing some modelling
First thing, lets configure our sources, this is so that we can reference data that already exists in our DWH i.e. the seed data. In a real DWH you would configure all of your data sources that were loaded in outside of dbt as sources so that you could then reference them using the dbt source macro.
-- models/staging/fake/src_fake.yml
version: 2
sources:
  - name: fake
    schema: "{{ target.schema }}"
    tables:
      - name: orders
      - name: customers
      - name: payments
Here we have declared our sources, we have nested them in the fake folder, which is the name of our source, and we have declared the names of the tables (the ones we seeded). As you can see the schema is specified dynamically depending on the targets schema. If we had a common schema for our seed data we could just hard code it, but we seed our data into the dev and the prod schemas, and so we need this to be dynamic.
So now we have created the ability to reference our source tables in dbt we can make some models. These will be staging models and will do extremely basic rename and selects as per the recommendation. For example lets take a look at how we stage the customers table from the fake source.
-- models/staging/fake/stg_fake__customers.sql
SELECT
    id AS customer_id,
    first_name,
    last_name
FROM
    {{ source(
        'fake',
        'customers'
    ) }}
As you can see we’ve done barely anything, we have used the macro to reference the customer table source, and we have renamed the id column to customer_id.
I also want to point out the naming convention and directory hierarchy. We have models/staging/<SOURCENAME>/<ABBREVIATION_SOURCENAME__TABLENAME>. This is detailed in the links I provided above.
Now lets run dbt and create these source tables, I will be running dbt with a -s argument so that I can select ONLY the staging tables, this is because I have other models that I don’t want to run yet.
dbt run -s jaffle_shop.staging.fake
Log in to your database to check out the new stuff you’ve created!
Everything is created as a view by default so we can just list the views to see all of our staged tables!
dwh=> \dv
                    List of relations
 Schema |        Name         | Type |       Owner
--------+---------------------+------+--------------------
 dev    | stg_fake__customers | view | dwh_dev_owner_user
 dev    | stg_fake__orders    | view | dwh_dev_owner_user
 dev    | stg_fake__payments  | view | dwh_dev_owner_user
(3 rows)
Making our first model
Lets add the following model to models/customers.sql.
-- models/customers.sql
with customers as (

    select
        id as customer_id,
        first_name,
        last_name

    from {{ ref('raw_customers') }}

),

orders as (

    select
        id as order_id,
        user_id as customer_id,
        order_date,
        status

    from {{ ref('raw_orders') }}

),

customer_orders as (

    select
        customer_id,

        min(order_date) as first_order_date,
        max(order_date) as most_recent_order_date,
        count(order_id) as number_of_orders

    from orders

    group by 1

),


final as (

    select
        customers.customer_id,
        customers.first_name,
        customers.last_name,
        customer_orders.first_order_date,
        customer_orders.most_recent_order_date,
        coalesce(customer_orders.number_of_orders, 0) as number_of_orders

    from customers

    left join customer_orders using (customer_id)

)

select * from final
EOF
Now I did have to modify the references here for the tables in the from statements. I have replaced this with the {{ ref('table_name') }} syntax.
Lets execute our models again and hopefully we will have a customers view created!
dbt run
Let’s check it out using psql
select * from customers limit 5;
 customer_id | first_name | last_name | first_order_date | most_recent_order_date | number_of_orders
-------------+------------+-----------+------------------+------------------------+------------------
           1 | Michael    | P.        | 2018-01-01       | 2018-02-10             |                2
           2 | Shawn      | M.        | 2018-01-11       | 2018-01-11             |                1
           3 | Kathleen   | P.        | 2018-01-02       | 2018-03-11             |                3
           4 | Jimmy      | C.        |                  |                        |                0
           5 | Katherine  | R.        |                  |                        |                0
(5 rows)
Delete the examples and cleanup the dbt_project.yml
Just quickly lets delete the example models that exist.
rm -rf models/examples
And clean up the reference to them in the models.jaffle_shop section of dbt_project.yml. this should result in the following:
# ...
models:
  jaffle_shop:
Creating some more models
Now we are going to go a bit further and stage our raw tables, we are also going to rename some columns, don’t worry this is all as per the dbt tutorial!
-- models/stg_customers.sql
select
    id as customer_id,
    first_name,
    last_name
from {{ ref('raw_customers') }}
-- models/stg_orders.sql
select
    id as order_id,
    user_id as customer_id,
    order_date,
    status
from {{ ref('raw_orders') }}
Now that we have this we are actually going to reference these tables in our original customers.sql model to use these staged tables instead!
-- models/customers.sql
with customers as (

    select * from {{ ref('stg_customers') }}

),

orders as (

    select * from {{ ref('stg_orders') }}

),

customer_orders as (

    select
        customer_id,

        min(order_date) as first_order_date,
        max(order_date) as most_recent_order_date,
        count(order_id) as number_of_orders

    from orders

    group by 1

),


final as (

    select
        customers.customer_id,
        customers.first_name,
        customers.last_name,
        customer_orders.first_order_date,
        customer_orders.most_recent_order_date,
        coalesce(customer_orders.number_of_orders, 0) as number_of_orders

    from customers

    left join customer_orders using (customer_id)

)

select * from final
And now we can create this all.
dbt run
Running dbt tests
This is a bit of a selling point for dbt in my opinion, baked in ability to write tests for your DWH. Any type of testing can increase our confidence around the pipelines we have created and this is a great first step.
So lets go ahead and define our tests!
-- models/schema.yml
version: 2

models:
  - name: customers
    description: One record per customer
    columns:
      - name: customer_id
        description: Primary key
        tests:
          - unique
          - not_null
      - name: first_order_date
        description: NULL when a customer has not yet placed an order.

  - name: stg_customers
    description: This model cleans up customer data
    columns:
      - name: customer_id
        description: Primary key
        tests:
          - unique
          - not_null

  - name: stg_orders
    description: This model cleans up order data
    columns:
      - name: order_id
        description: Primary key
        tests:
          - unique
          - not_null
      - name: status
        tests:
          - accepted_values:
              values: ['placed', 'shipped', 'completed', 'return_pending', 'returned']
And run them! which is so so simple. Now there is no excuses for not writing tests and checks!
dbt test
Examine the dbt docs
You may have noticed that just above in the models/schema.yaml we included some descriptions of various things including columns and models. This will help be sucked up into the documentation when we generate it. This is pretty amazing and another awesome selling point of dbt.
dbt docs generate
dbt docs serve
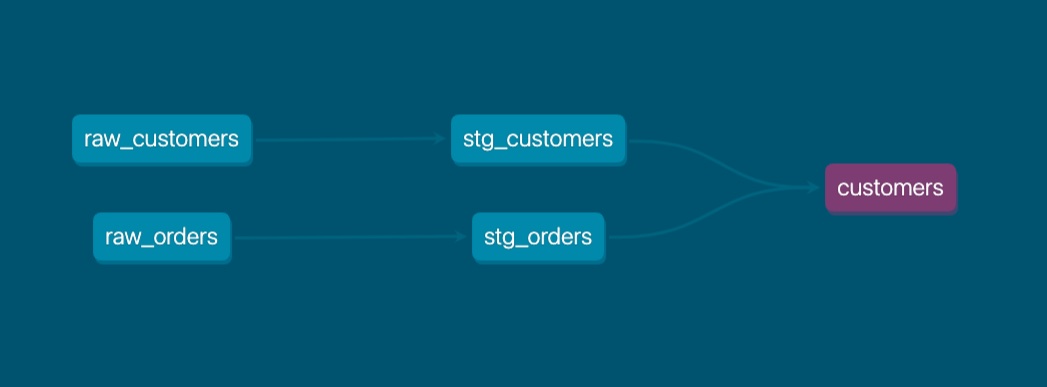
This should have opened your default browser, otherwise you can navigate to it via http://localhost:8080 and check out all of the cool stuff, namely the lineage graph:
Finally merge your branch back in to your main branch via a Pull Request / Merge Request.